Managing Subscribers
Subscribers are the people you want to send emails to. Both Broadcast and Sequence emails require a subscriber to be present in the channel they are being sent from.
Transactional emails do not require a subscriber to be present in the channel they are being sent from.
Subscriber Information
For each subscriber, you can store the following information:
- Email address (required)
- First name
- Last name
- IP address
- Tags (comma separated list of tags)
- Active (true or false)
- Source (how the subscriber was added)
- Subscribed at date (required)
- Unsubscribed at date
- Custom data (JSON format)
The required values are indicated above.
For data protection reasons, you cannot alter the unsubscribed at date. For the subscribed at date, this is set automatically when a subscriber is entered manually.
When importing subscribers via a CSV or TSV file or adding subscribers via the API, the subscribed at date can be specified.
Adding Subscribers
There are three ways to add subscribers to a channel:
- Manual entry
- CSV or TSV import (comma or tab separated values)
- API integration
1. Adding subscribers manually
To manually add a subscriber, click on Subscribers in the sidebar, then click on Add subscriber (or use the dropdown menu and select Import subscribers).
Fill in the required fields and click Add subscriber.
2. Adding subscribers via CSV or TSV import
To add subscribers via a file, click on Subscribers in the sidebar, then click the dropdown menu next to "Add subscriber" and select Import subscribers.
You can upload either a CSV (comma separated values) or TSV (tab separated values) file. It is recommended that you use a spreadsheet program like Google Sheets or Excel and export the file in your preferred format.
3. Adding subscribers via API
Documentation coming!
Segmentation
Broadcast includes a powerful segmentation feature that allows you to create dynamic groups of subscribers based on rules. You can segment by standard subscriber fields (email, name, tags, engagement activity) as well as by any key stored in a subscriber's custom data. For example, you can create a segment for all subscribers where plan equals premium or where preferences.language equals en.
To learn more about creating and managing segments, see the Segments API documentation. For details on custom data segmentation, including supported operators and examples, see the Custom Data Segment Examples section.
Viewing Subscribers
To view subscribers, click on Subscribers in the sidebar.
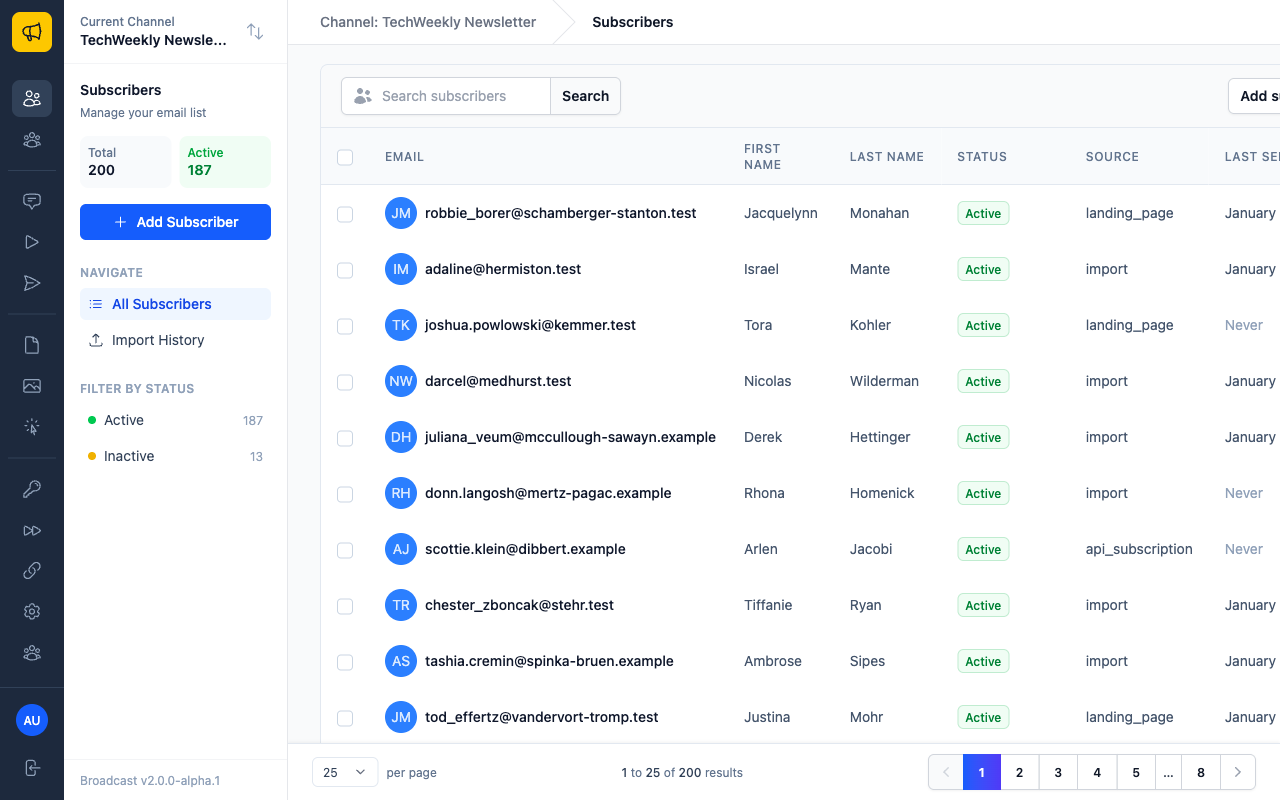
You can search for specific subscribers by entering their full or partial email address, or by entering their name. The system will try to find the closest match.
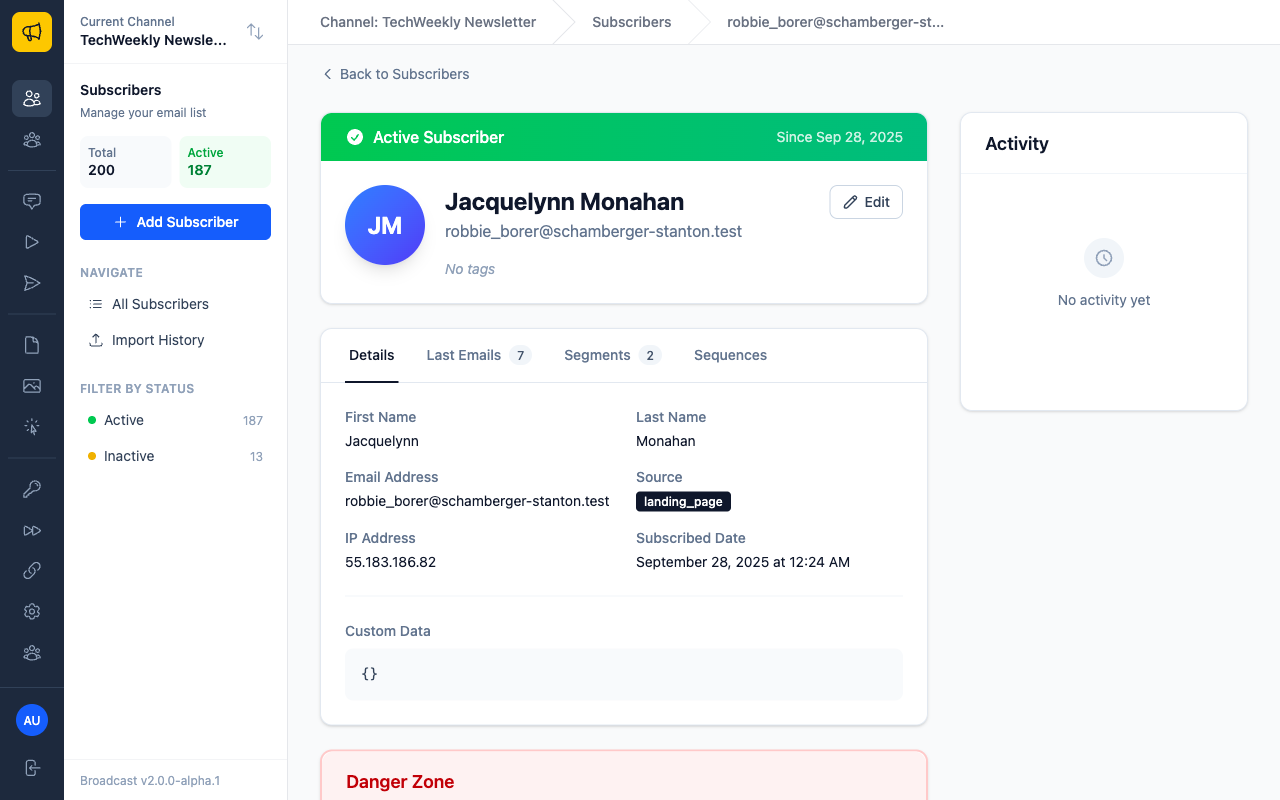
Subscriber Detail Page
When you click on a subscriber, you will see their profile page with the following tabbed sections:
- Details: View and edit subscriber information including name, email, source, IP address, subscribed date, and custom data
- Last Emails: See recent broadcasts that have been sent to this subscriber
- Segments: View which segments this subscriber belongs to based on your segmentation rules
- Sequences: See which email sequences this subscriber is enrolled in and their progress
On the right side of the screen, you will see the Activity sidebar showing all recent activity associated with this subscriber, such as when they were added, updated, or received emails.
Active vs Unsubscribed Status
Subscribers can be marked as active or inactive. Subscribers can also be noted to have unsubscribed from the channel.
The difference between active/inactive and unsubscribed is important to understand:
- Active: The subscriber will receive all broadcasts, sequences, and transactional emails sent from the channel.
- Inactive: The subscriber will not receive emails. This status is set internally by you.
- Unsubscribed: The subscriber will not receive any emails sent from the channel, regardless of their active status. This status is typically set by the subscriber themselves when they click an unsubscribe link.
The easiest way to differentiate this is that the unsubscribed status is set by the subscriber themselves, while the active status is set internally by you.
For this reason, it is recommended that if you have different interactions with subscribers (e.g., transactional emails vs marketing emails), create the subscriber in two separate channels.
Mass Deactivation of Subscribers
Broadcast allows you to deactivate multiple subscribers at once by uploading a text file containing their email addresses. This feature is useful for cleaning up your subscriber list or removing inactive contacts in bulk.
How to Access Mass Deactivation
To access the mass deactivation feature:
- Navigate to Subscribers in the sidebar
- Click the Open options button (three dots icon) next to "Add subscriber"
- Select Deactivate subscribers from the dropdown menu

Using the Mass Deactivation Tool
Once you click "Deactivate subscribers", you'll be taken to the deactivation page where you can upload your file:
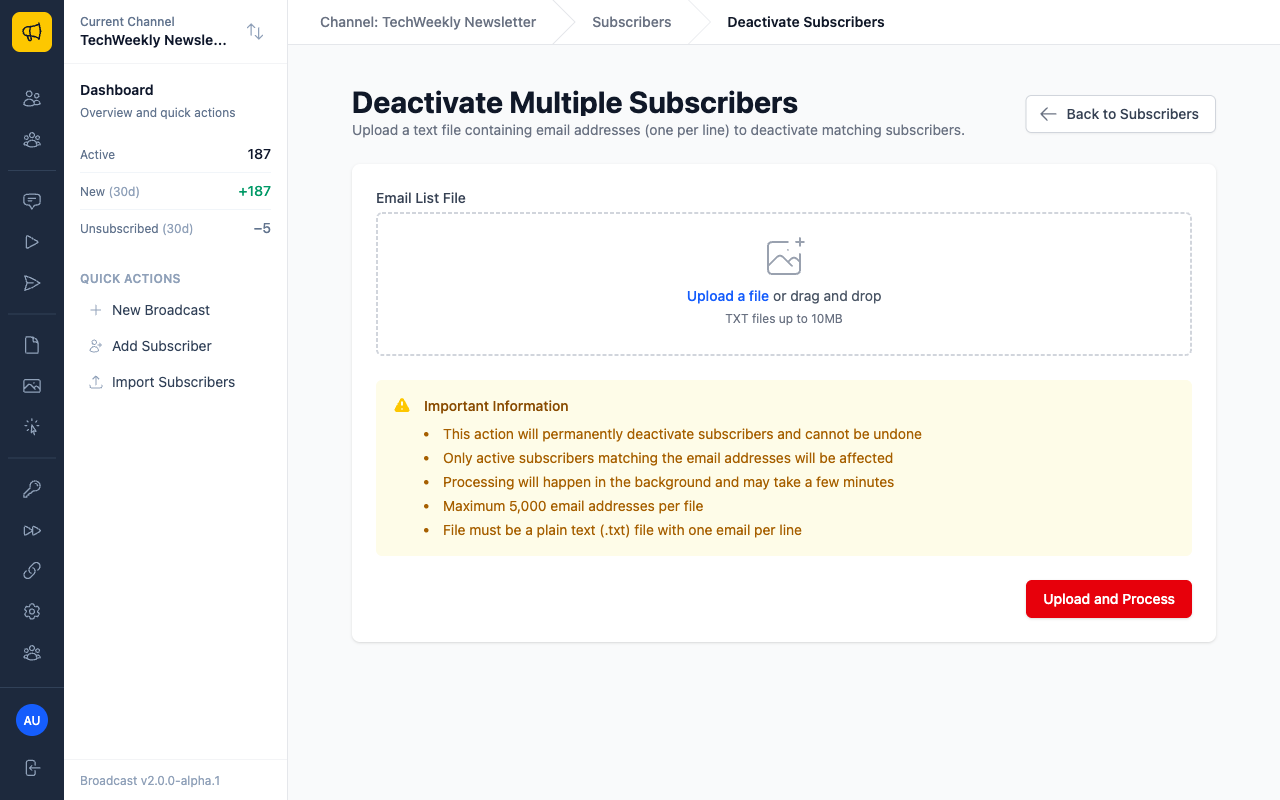
File Requirements
Your email list file must meet the following criteria:
- File format: Plain text (.txt) file only
- Content: One email address per line
- Maximum addresses: 5,000 email addresses per file
Upload Process
- Prepare your file: Create a plain text file with one email address per line
- Upload the file: Click "Upload a file" or drag and drop your .txt file into the upload area
- Review and process: Click "Upload and Process" to start the deactivation
Important Considerations
Before using the mass deactivation feature, be aware of the following:
- Permanent action: This action will permanently deactivate subscribers and cannot be undone
- Active subscribers only: Only active subscribers matching the email addresses will be affected
- Background processing: Processing will happen in the background and may take a few minutes
- Exact match required: Email addresses must exactly match those in your subscriber list
Best Practices for Mass Deactivation
- Backup first: Consider exporting your subscriber data before performing mass deactivations (when export feature becomes available)
- Test with small batches: For large lists, consider processing smaller batches first
- Verify email formatting: Ensure all email addresses are properly formatted and one per line
- Double-check your list: Review your email list carefully as the action cannot be undone
Deleting Subscribers (GDPR Redaction)
Broadcast provides comprehensive subscriber deletion functionality for GDPR compliance and data privacy requirements. When subscribers are "deleted," their personally identifiable information (PII) is permanently redacted while preserving campaign statistics and analytics.
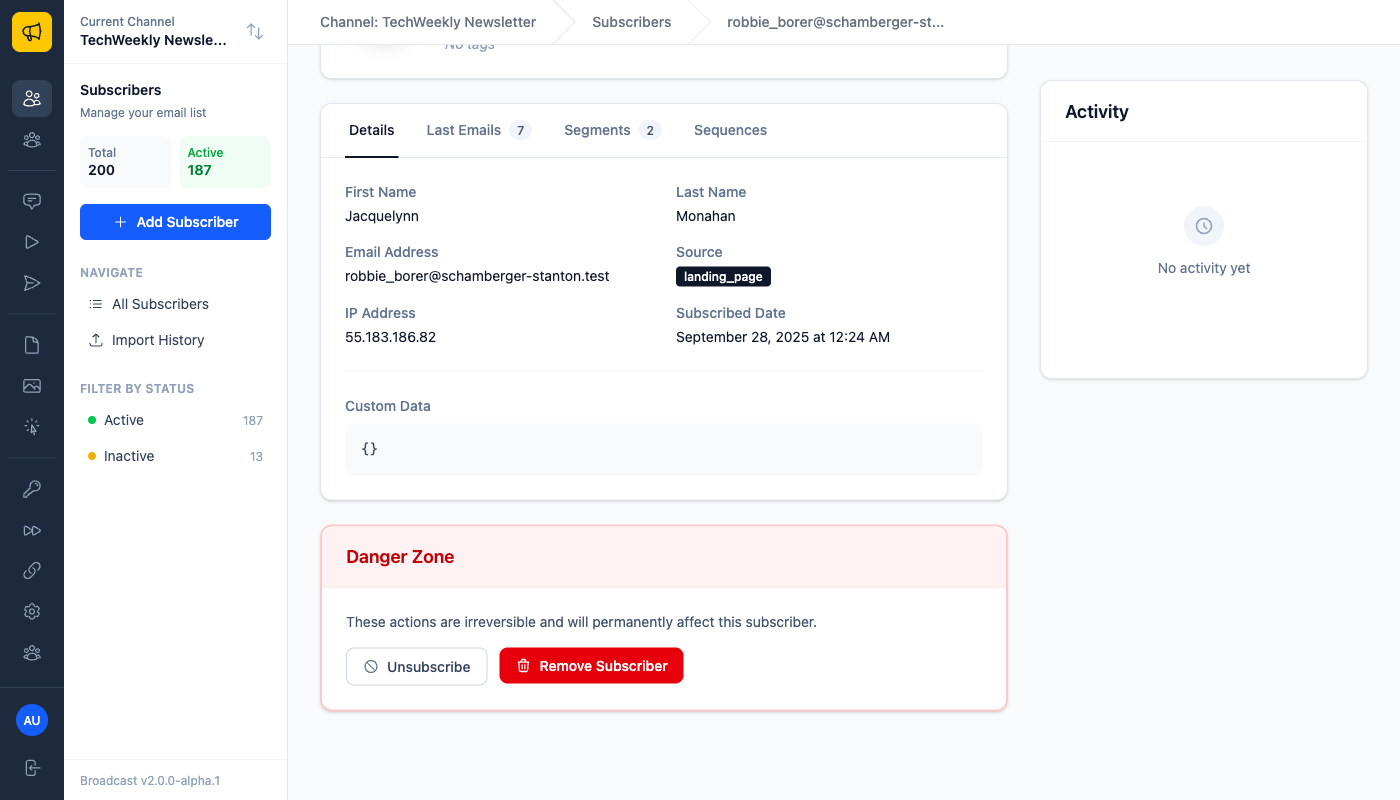
Individual Subscriber Deletion
You can delete individual subscribers directly from the subscriber details page:
- Navigate to Subscribers in the sidebar
- Click on the subscriber you want to delete
- On the subscriber details page, scroll down to the Danger Zone section
- Click the Remove Subscriber button
- Confirm the deletion in the modal that appears
⚠️ Warning: This action is irreversible. Once deleted, subscriber personal data cannot be recovered.
Bulk Subscriber Deletion
For deleting multiple subscribers at once, Broadcast provides a bulk selection interface:
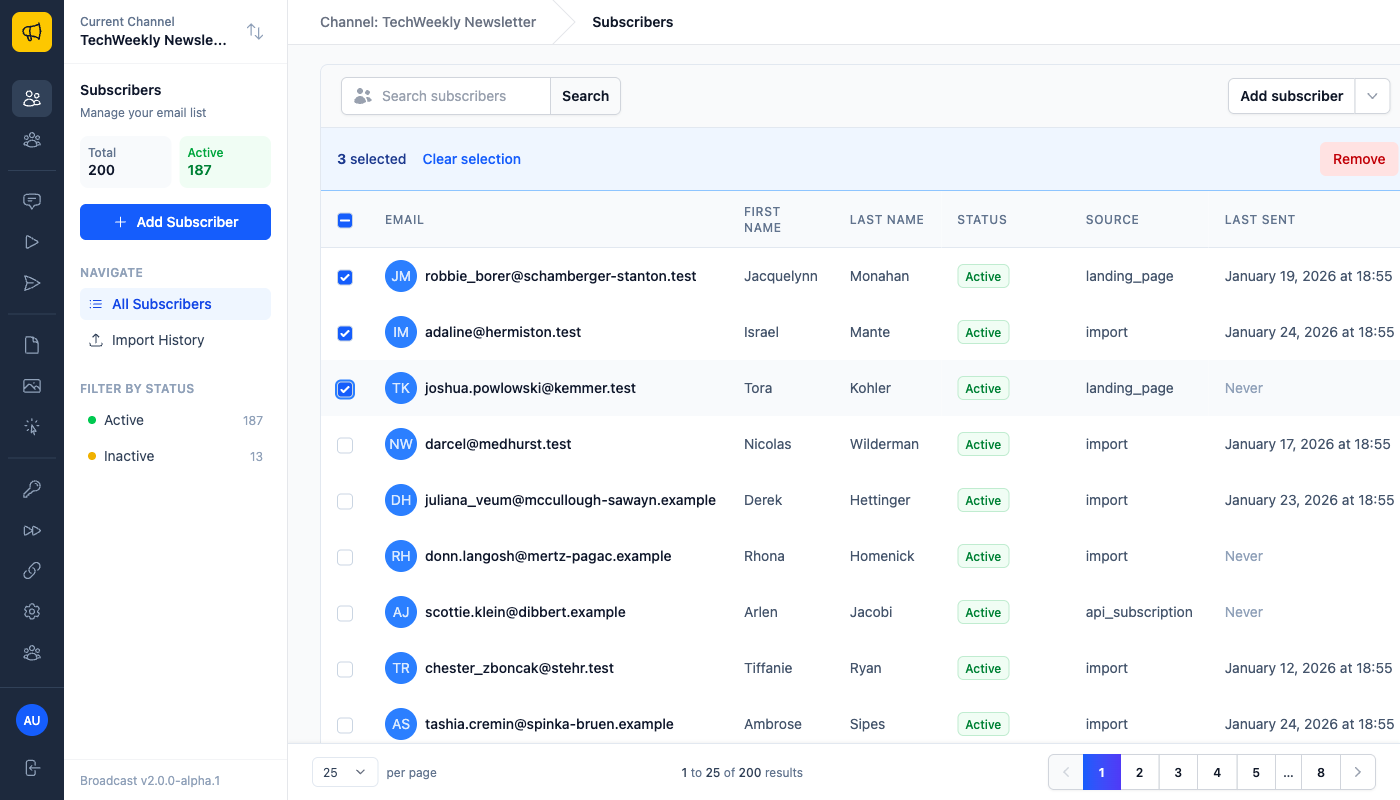
Using Bulk Selection
- Navigate to Subscribers in the sidebar
- Use the checkboxes next to subscriber emails to select multiple subscribers
- Use the "Select All" checkbox in the table header to select all subscribers on the current page
- Once subscribers are selected, a blue action bar will appear showing the number of selected subscribers
- Click Remove to proceed with bulk deletion
Bulk Selection Features
- Selection count: The action bar displays how many subscribers are currently selected
- Clear selection: Click "Clear selection" to deselect all subscribers
- Page-level selection: The "Select All" checkbox selects all subscribers on the current page
Confirmation Process
When you click "Remove," you'll see a detailed confirmation modal that shows:
- Number of subscribers to be deleted
- List of subscriber emails (for selections of 10 or fewer)
- What will be removed: Email addresses, names, custom data, IP addresses, activity history
- What will be preserved: Campaign statistics, open/click rates, sequence performance data
- Warning message: Emphasizing that the action cannot be undone
What Gets Deleted vs. Preserved
Information That Gets Deleted (Redacted)
When a subscriber is deleted, the following information is permanently removed or anonymized:
- Email address: Replaced with an anonymized identifier (
redacted-{id}@privacy-compliant.local) - First and last names: Completely removed
- Custom data fields: All custom data is cleared
- IP addresses: Removed for privacy
- Personal preferences: Cleared
- Activity history details: Personal identifiers removed
Information That Gets Preserved
To maintain the integrity of your campaign analytics and reporting, the following data is preserved:
- Campaign statistics: Open rates, click rates, delivery statistics remain accurate
- Sequence performance data: Automation engagement metrics are maintained
- Aggregate reporting: Overall campaign performance and trends
- Subscriber ID and timestamps: For referential integrity in historical reports
- Revenue and conversion tracking: Business metrics remain intact
GDPR Compliance
This deletion system is designed to meet GDPR "right to be forgotten" requirements:
- Complete PII removal: All personally identifiable information is permanently deleted
- Data minimization: Only essential business data is retained
- Audit trail: Deletion actions are logged for compliance purposes
- Irreversible process: Ensures data cannot be accidentally recovered
- Statistical integrity: Maintains accurate business reporting while protecting privacy
Best Practices for Subscriber Deletion
- Verify selections carefully: Double-check your selection before confirming deletion
- Document requests: Keep records of deletion requests for compliance purposes
- Batch processing: For large deletions, consider processing in smaller batches
- Review before deletion: Use the confirmation modal to review exactly what will be deleted
- Consider alternatives: Evaluate if deactivation might be sufficient before permanent deletion
Important Considerations
- Irreversible action: Deleted subscriber data cannot be restored under any circumstances
- Campaign integrity: Historical campaign performance data remains accurate
- Legal compliance: Ideal for responding to GDPR data deletion requests
- Business continuity: Analytics and reporting functions are not disrupted
- Audit requirements: All deletion actions are logged for regulatory compliance
Exporting Subscribers
An export feature is not yet available but is on the roadmap.